


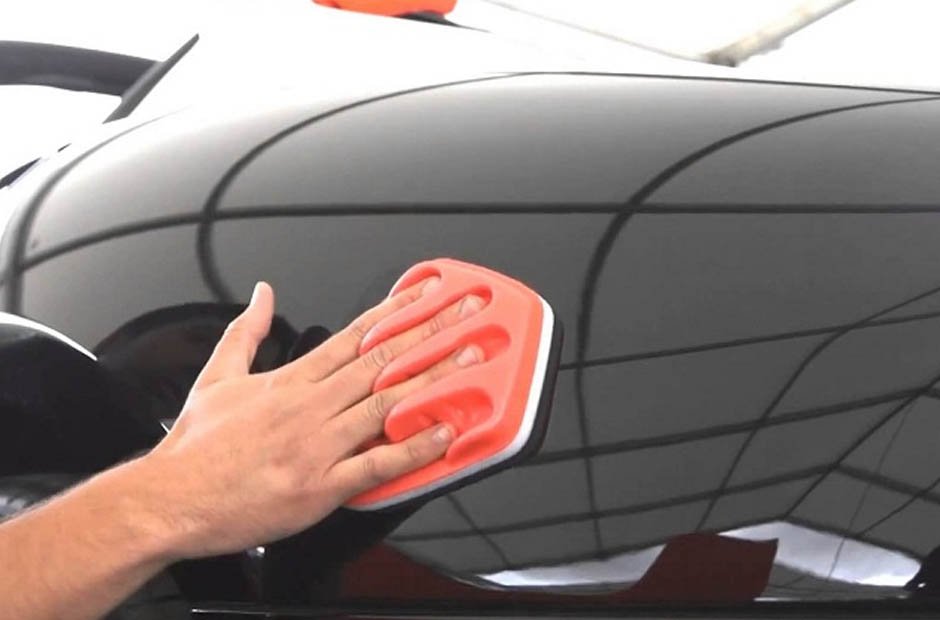
Jumping straight into polishing your car can be tempting, but hold on. I know from experience that there are crucial steps to take before reaching for that polish.
These aren’t just arbitrary chores. By following these steps, you’re setting yourself up for a more efficient polishing process and, importantly, minimizing the risk of causing damage to your pride and joy.
It’s like laying solid groundwork – a little effort at the start, but worth it in the long run. Stick around, I’ll guide you through what you need to do before getting your car to shine like a new penny.
1. Thoroughly Wash a Car
Okay, let’s kick things off with step one: thoroughly wash your car.
Before you even think about polishing, your car’s paint needs to be crystal clear. I’m not talking about a quick rinse and scrub here.
You’ll need a detailed car wash. This is your chance to banish any dirt, dust, and other pesky contaminants from the paint.
This initial cleanse is crucial. Why? Because it gives you a pristine area to work with. The last thing you want is to drag dirt across your car with a polisher. Trust me, a clean start makes for a smoother journey.
2. Decontaminate The Paint
So, you’ve washed your car thoroughly. Great. But we’re not quite done with cleaning yet. Next up is decontaminating the paint.
Even after a detailed wash, some stubborn contaminants might cling onto the paint. Don’t worry, I have a solution: perform both chemical and mechanical decontamination.
Start with chemical decontamination. Here, iron removers are your friend. After that, move on to mechanical decontamination using a clay bar.
The purpose? To make sure that when it’s time to polish, there’s nothing between your car’s clear coat and the buffing pads. Just imagine: your car’s paint and your buffing pads in perfect harmony.
But remember, don’t overdo it. If your car was recently decontaminated, you might not need to do this. Here’s a quick test: slide your finger over the paint. If it feels rough, then it’s time for decontamination. Otherwise, you’re good to go.
3. Inspect the Car For Paint Defects
After decontaminating the paint, your next task is to play detective. It’s time to inspect the car for paint defects.
Give your car a good once-over. You’re looking for deeper scratches that might need a touch-up or professional painting. Also, keep an eye out for any scratches that will need special care while polishing.
Most of the time, cars have minor scratches and swirl marks. That’s normal. But those deeper scratches? Make sure to take note of them. You don’t want to forget about them when it’s time to polish.
Knowing the condition of your paint doesn’t just prepare you for the polishing process. It also helps you choose the right buffing pads, compounds, and polishes. In other words, the better you know your car’s paint condition, the better your polishing results will be.
4. Measure The Paint Thickness
Now, let’s move on to a step that’s often overlooked: measuring the paint thickness. Don’t be fooled. This step is extremely important.
You see, not all cars sport the same depth or hardness of clear coat. For instance, Japanese cars tend to have softer paint compared to their European counterparts.
Additionally, your car might have been repainted before, and without a measure, it’s impossible to know if there’s enough clear coat on the vehicle.
That’s why I firmly believe in using one of the best paint thickness gauges. With one of these handy devices, you can scan the whole car, take average measures and know exactly how much elbow grease to put into buffing. This way, you’ll stay in the safe zone, avoid damaging the clear coat, and still achieve that mirror-like shine.
5. Protect Sensitive Areas
The fifth and final step before you begin polishing is to protect sensitive areas. Many folks overlook this step, but trust me, it’s a game-changer.
Polishes and compounds can be tricky to remove from unpainted plastics, rubber, and other sensitive materials. If they get in these spots, they can really put a damper on your detailing work. So, what’s the solution?
It’s simple – just reach for some 3M tape and cover those sensitive areas. It might seem like an extra step now, but if it saves you from a difficult clean-up later, it’s worth it.
Think of it as an insurance policy for your car detailing job. It only takes a few minutes to apply the tape around sensitive areas, but the peace of mind it provides? Priceless.
Bottom Line
Rushing straight to polish your unwashed car without the necessary prep steps is a recipe for disaster. It’s like going into battle without a plan – you won’t know what paint defects you’re dealing with, and you won’t be equipped with the right techniques to make your car truly shine.
Remember, each step I’ve shared with you serves a purpose, whether it’s ensuring you have a clean, clear surface to work with, or making sure you don’t harm the sensitive areas. Each one sets you up for success in the polishing stage.
So, the next time you’re ready to polish your car, pause for a moment, remember these tips, and give your car the preparation it deserves. Trust me, you and your car will be grateful for it.


